
Month: May 2026
Best Promotional Products for Trade Shows in Australia (2026 Guide)
🎪 Why Trade Shows Still Deliver Some of the Best ROI in Promo
Digital ads get skipped. Cold emails get binned. But a branded drink bottle still sitting on someone’s desk three months after a trade show? That’s your logo earning its keep without costing you another cent. Trade shows put you face-to-face with a room full of people who actually showed up because they care about your industry. In 2026, that’s worth a lot — and branded merch is how you make the moment stick.
The trick is not to just rock up with a box of pens and call it done. The businesses that get the most out of trade show merch treat it as a layered strategy — different products for different types of conversations. Someone who stops at your booth for three seconds gets something different to the procurement manager who spends 20 minutes asking detailed questions. Once you get that thinking right, promo products stop feeling like a sunk cost and start pulling their weight properly.
💰 The 3-Tier Trade Show Merch Strategy
This is what separates the exhibitors who get results from the ones who blow their whole budget on 200 premium items and run out by 10am on day one. Three bands: high-volume giveaways, mid-range conversation starters, and premium close items. Each one has a different job. Before you set those bands, read our budget vs premium promotional products guide for the fuller audience, use and lifetime-value framework.
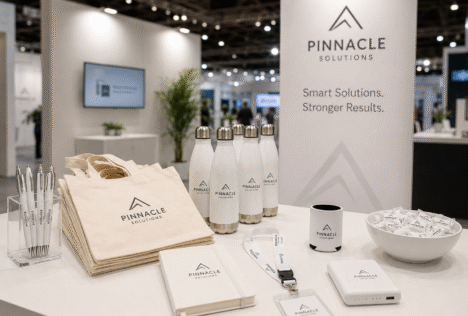
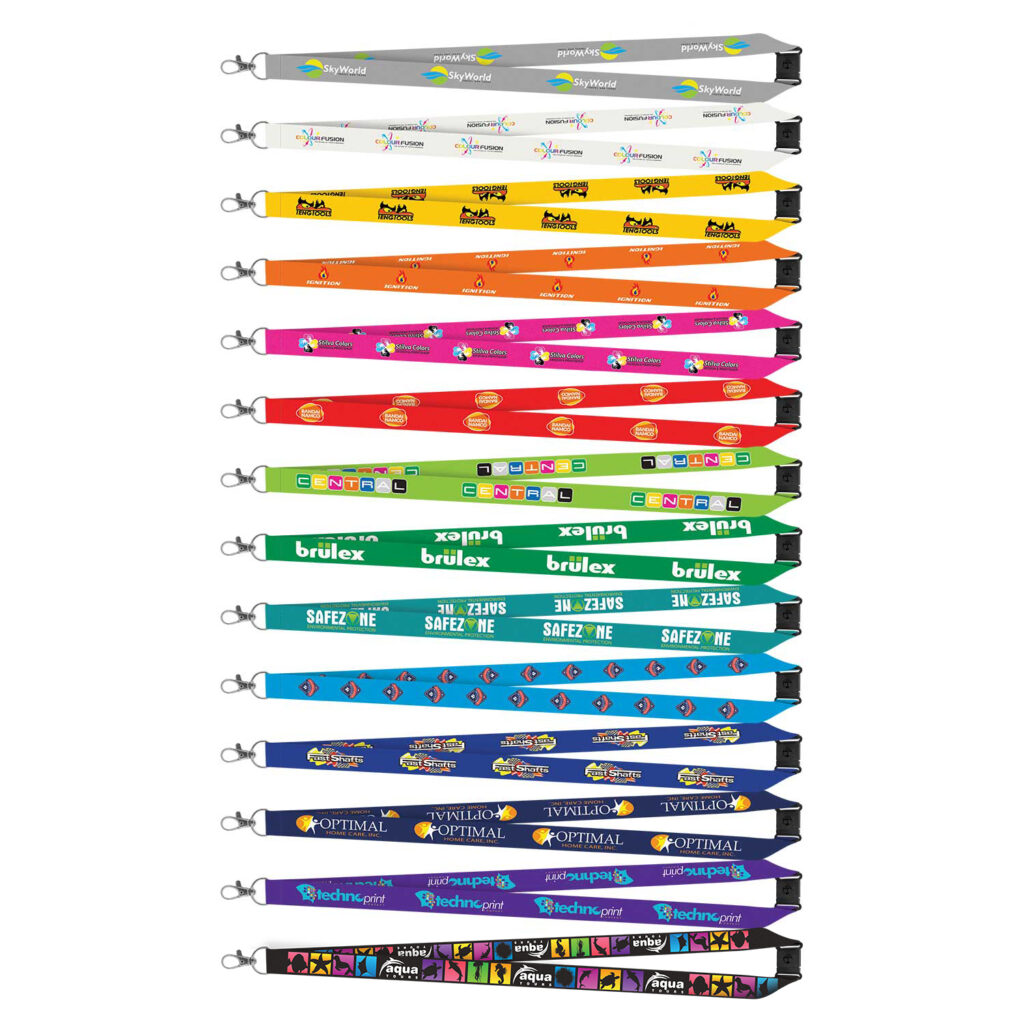
Tier 1 — High-Volume Giveaways (under $3 per unit): These go to everyone who passes your booth. Their job is brand exposure, not lead conversion. Think pens, mints, lollies, stress balls, keyrings, and lanyards. Budget $1.50–$2.50 per unit at quantities of 500+. A branded pen that travels home in someone’s bag or ends up on a colleague’s desk is still doing a job for you weeks later. Mints and lollies are especially good at drawing foot traffic — people stop, you start a conversation.
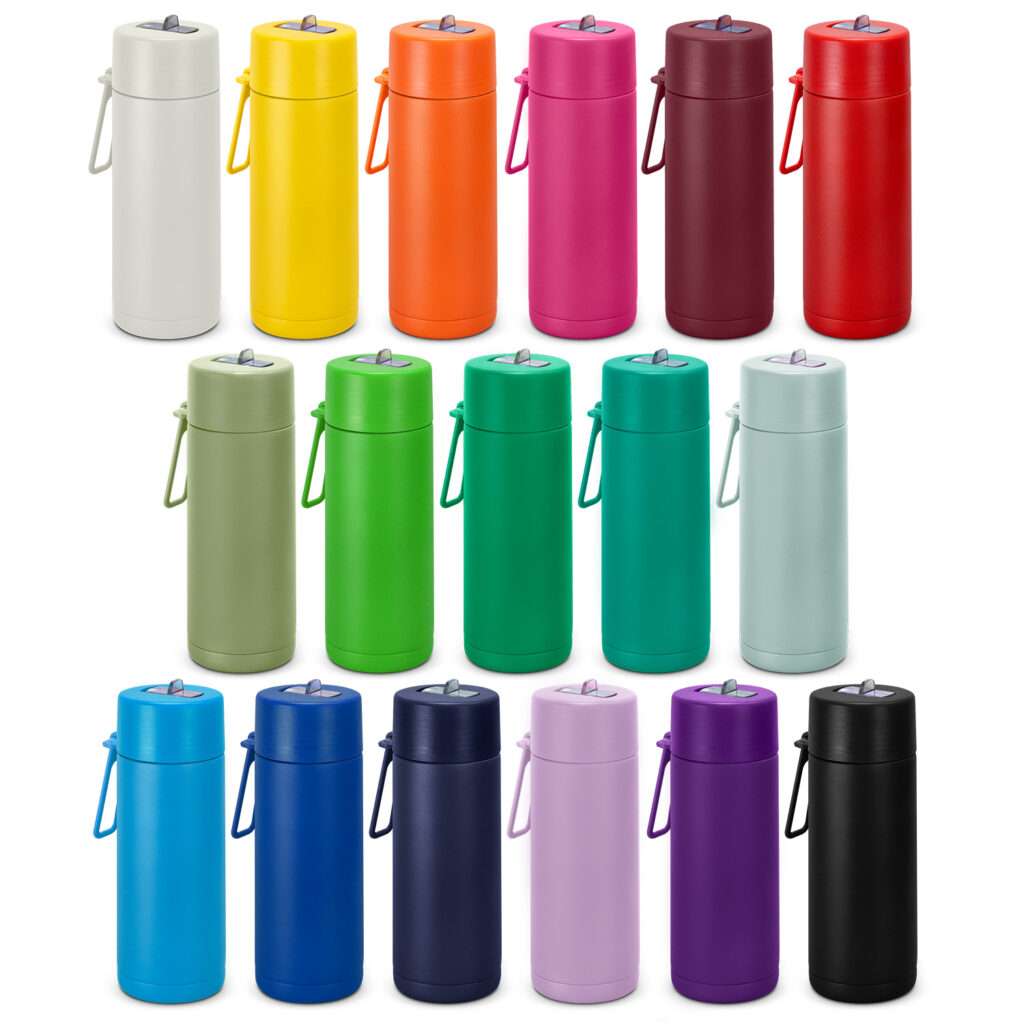
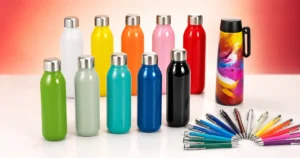
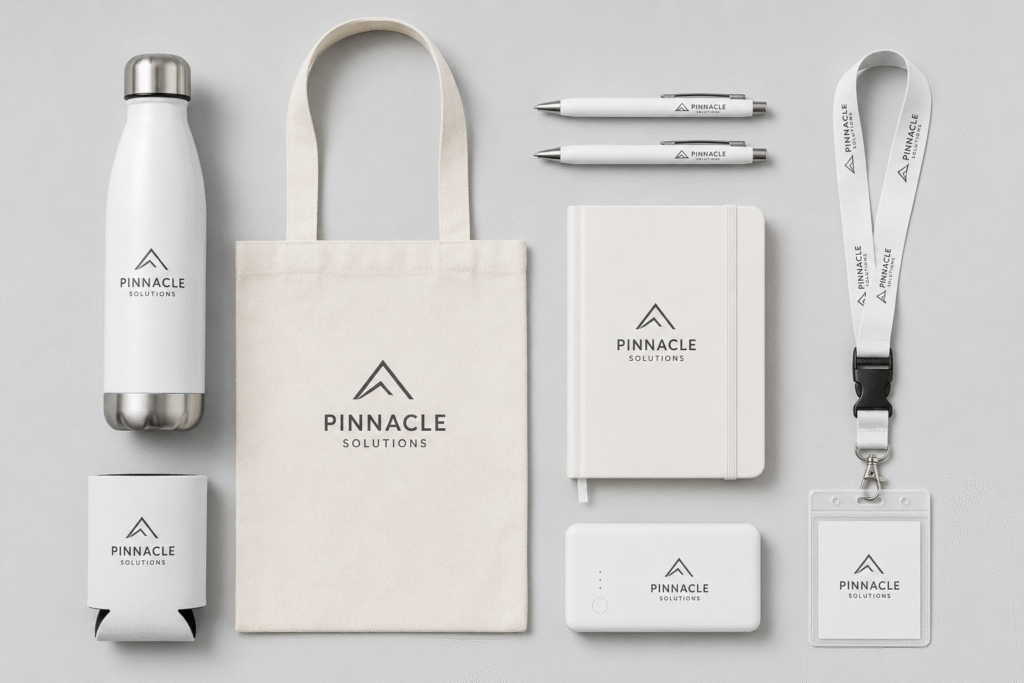
Tier 2 — Mid-Range Items ($3–$15 per unit): For people who’ve had a real conversation with you — they’ve scanned their badge, asked questions, or shown genuine interest. Drink bottles, tote bags, notebooks, stubby holders, and reusable coffee cups sit comfortably in this range. These items have longer daily use — your logo on a coffee cup gets seen every morning. Order quantities of 150–300 depending on expected booth traffic and your follow-up process.
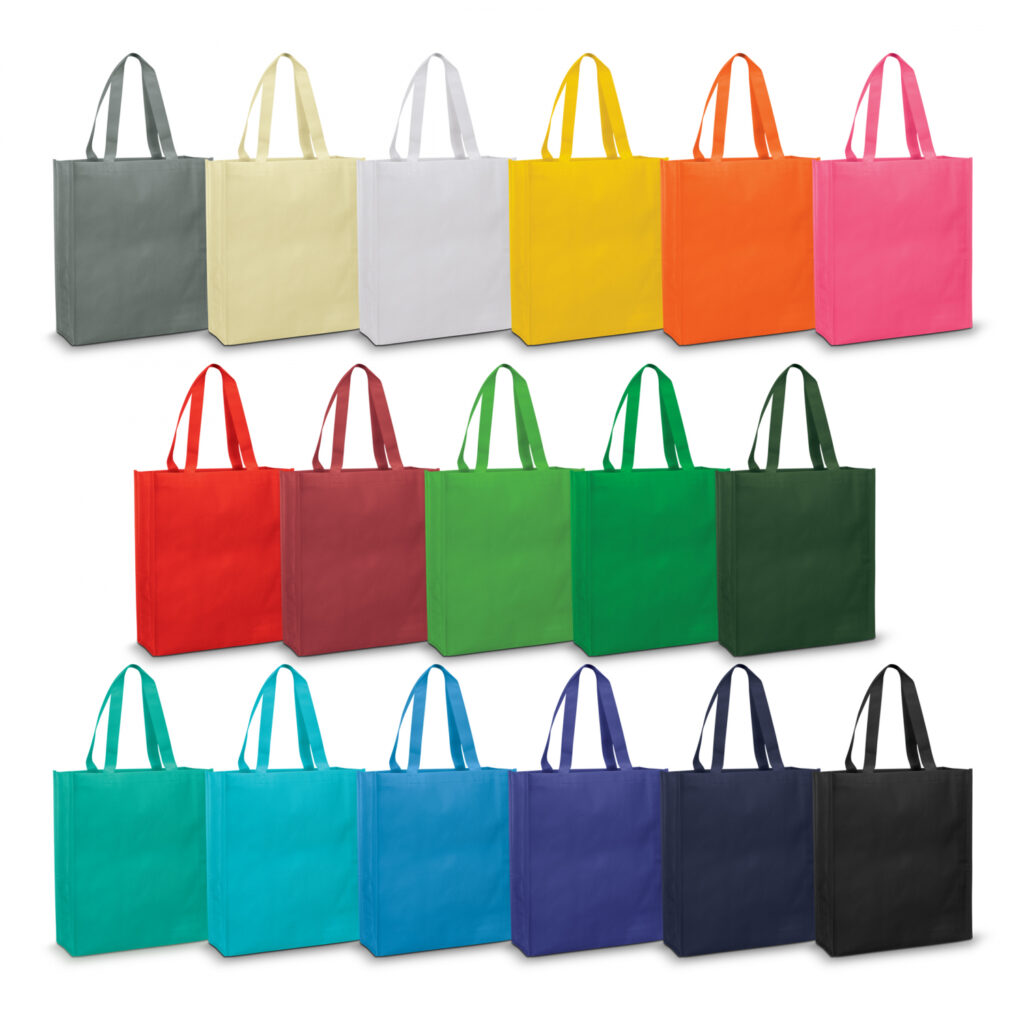
Tote bags work well at trade shows because they are useful on the day and keep your logo moving afterwards. Before choosing one, compare cotton, non-woven, jute and recycled cotton tote bags so the material fits your budget, artwork and the way attendees will use it.
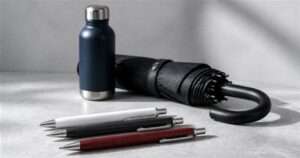
Tier 3 — Premium Close Items ($15–$60+ per unit): Reserved for your hottest leads — the ones you’re already writing proposals for, or VIP clients you want to show you value the relationship. Insulated bottles, branded power banks, quality umbrellas, premium tech accessories. These aren’t giveaways — they’re a closing tool. Order 25–75 units. Having 50 of these is plenty for a 2-day show if your Tier 1 and 2 are doing their job filtering conversations.
🛍️ Solving the Trade Show Bag Problem
Here’s something most exhibitors don’t think about until they’re standing at their booth watching people walk past: attendees need somewhere to put all the stuff they’re picking up. A branded bag handed out early in the day is one of the smartest things you can do at a trade show. Every person who takes one becomes a walking billboard for the rest of the day. Other exhibitors see it. Other attendees see it. And your bag is now the one carrying all your competitors’ flyers too.
Non-woven tote bags start from around $2.50–$4.00 at 300+ units. Reusable calico or cotton totes are pricier at $5–$9 but have far better shelf life — people actually keep and reuse them. If you’re at a show where sustainability messaging matters to your audience, the cotton option is worth the extra spend. At a trade show expecting 1,000+ attendees, having 400–500 branded bags isn’t over-ordering — it’s strategy.
🏗️ Matching Products to Your Industry
What works depends on who you’re handing it to. Here’s a quick breakdown by sector:
Industry Fit Guide:
Mining & Construction: Practical wins every time. Safety-yellow lanyards, stubby holders, heavy-duty keyrings, and insulated bottles for site workers. These get used on-site, not stuffed in a drawer. Avoid anything too delicate — it won’t survive a worksite.
Corporate & Finance: Premium positioning matters. Notebooks with a quality feel, sleek pens, power banks, and insulated travel mugs. Colour-match to your brand if possible. Cheap items can actually hurt your perception in this sector.
Health & Wellness: Drink bottles, reusable coffee cups, and stress balls hit the brief. Anything that signals an active, health-conscious brand. Avoid single-use plastics — it sends the wrong message for this audience.
Education: Pens, notebooks, lanyards, and tote bags are all well-received. High-quantity budget items work well here since you’re often dealing with large volumes of staff and students. Tote bags in particular get heavy use in education settings.
Hospitality & Events: Fun, colourful items. Branded umbrellas (genuinely used in Perth and Brisbane outdoor venues), insulated wine tumblers or stubby holders, and anything that fits the venue aesthetic. Think about the person using it, not just the logo on it.
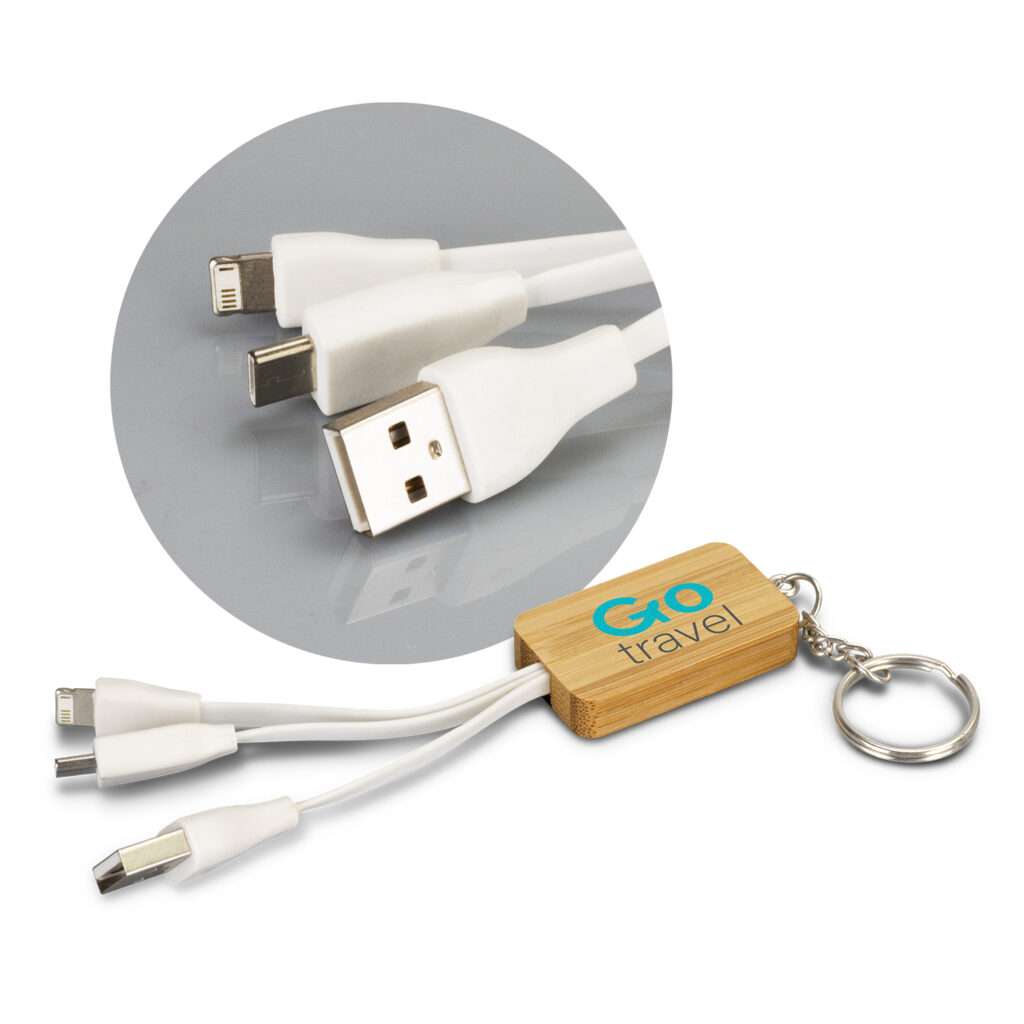
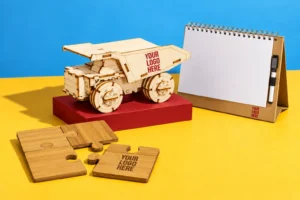
For something that fits your industry, have a look at our unusual promotional products guide. It includes a build-your-own mining truck for machinery businesses, plus compact options such as fidget pens and retractable charging cables for delegate bags.
📦 Quantity Planning: How Many Do You Actually Need?
Order too few and you run out by lunch. Order too many and you’re carting 300 tote bags back to the office (been there). Here’s a rough framework based on foot traffic:
Start with the show’s advertised attendance figure. For a regional industry event expecting 500 attendees over two days, you’re realistically getting foot traffic past your booth of maybe 30–50% of that — call it 200 genuine booth visits if you’re in a good location. From that 200: roughly 80% might take a Tier 1 item (160 units), 25% might be worth a Tier 2 item (50 units), and 5–10% are warm leads worth a Tier 3 item (10–20 units).
For a major national expo expecting 5,000 attendees, scale accordingly — you might budget for 1,500 Tier 1 items, 300–400 Tier 2, and 50–75 Tier 3. Always add a 15% buffer to Tier 1 and 2 to avoid running short. Running out on day one is the worst possible outcome — it signals to anyone who didn’t get something that they missed out, and you lose that brand touchpoint entirely.
One more thing: if you have a corner booth or a large floor presence at a major show, expect higher traffic than average. A small tabletop at a niche industry event will see less. Adjust your formula to the show, not just the headline numbers.
📅 Lead Times: When to Order for Your Show Date
This is where trade show prep falls apart for a lot of people. Leaving it too late is the single most common mistake we see — and it’s completely avoidable. Here’s a realistic guide to lead times for trade show orders:
Standard local stock items (pens, lanyards, basic keyrings): 7–10 business days from artwork approval. These have stock on hand and are branded quickly. In an emergency, rush jobs can sometimes be done in 3–5 business days but expect a premium.
Mid-range items (drink bottles, tote bags, notebooks): Allow 10–15 business days from artwork approval. Some items require import if specific colours or custom specs are needed — that can push to 4–6 weeks.
Premium or custom items (insulated bottles, power banks, umbrellas): 3–6 weeks minimum for in-stock items with branding. Full custom manufacturing from overseas is 10–14 weeks. If you’re planning something bespoke for a major event, start the conversation at least three months out.
The sweet spot for most trade show orders is placing your order 4–6 weeks before the show. That gives you time for artwork approval, production, delivery, and — critically — time to fix any issues without panicking. We’ve sorted plenty of last-minute jobs and we’ll always try our best, but no dramas is a lot easier when there’s time up your sleeve.
🖨️ Branding Methods: What Prints Well on What
The right print method keeps your logo looking sharp. The wrong one makes it flake off by week three. Quick rundown — and our full printing processes page goes deeper if you want the technical detail:
Screen printing is the go-to for tote bags, t-shirts, and fabric items. Excellent colour vibrancy, durable, cost-effective at 100+ units. Works best with solid logos (not photographic detail).
Pad printing is standard for pens, stress balls, and most hard plastic items. Cheap to set up, consistent results, handles small logos well. Usually 1–2 colour — if you have a complex logo, simplify it for this method.
Laser engraving is ideal for metal items — insulated bottles, keyrings, pens with metal barrels. No ink to chip or fade. Gives a premium, permanent look that suits corporate gifting and high-end trade show items.
Digital print / full colour suits notebooks, USB drives, and items where you need gradients or photographic quality. Higher per-unit cost but lets you reproduce complex artwork accurately.
One tip: always supply your logo as a vector file (AI or EPS) if you can. It means cleaner artwork at any size and fewer artwork fees. A PNG at 300dpi can work for digital print, but vector is always preferable.
🚫 Trade Show Merch Mistakes That Cost You
We’ve supplied merch for hundreds of trade shows across Australia. These are the stuff-ups we see over and over — and they’re all avoidable:
Ordering too late. Said it above, saying it again. Rush fees are real and rush options are limited. The show date doesn’t move for you.
Ignoring the bag problem. People need bags. If you don’t give them one, someone else will — and your competitor’s bag carries your flyers out the door. Solve this early.
One-size-fits-all approach. Handing a $50 power bank to someone who wandered past to grab a free pen is wasted spend. The tier system exists for a reason — use it.
Choosing products based on what YOU like. Your audience matters more than your personal taste. A mining safety manager has different preferences to a CBD marketing coordinator. Think about the person receiving it.
If the shortlist is still wide open, our practical guide to choosing promotional products starts with the audience, where the item will be used and the constraints that cannot move. Answer those before filling the three trade-show tiers.
Forgetting booth signage in the budget. Merch is only one piece of the exhibitions & events puzzle. Pull-up banners, tablecloths, and display stands pull the whole booth together. Don’t spend all your budget on products and show up with nothing behind you.
Underestimating freight to venue. Big quantities of branded merchandise are heavy. Factor in freight to the show venue, and make sure your items arrive at least a day before setup — not the morning of.
✅ Trade Show Merch Planning Checklist
Before You Order:
Confirm show date, setup times, and booth size
Get expected attendance figures from the organiser
Set your total merch budget and split across 3 tiers
Identify the right products per tier based on your audience/industry
Confirm logo files are available in vector format
Allow 4–6 weeks minimum lead time from order to show date
Ordering & Production:
Request quotes with quantities for each tier
Approve artwork proofs promptly — delays here cascade
Confirm delivery address: your office or direct to venue?
Check freight cost to venue if not delivering yourself
Order branded bags if you’re going with the bag strategy
At the Show:
Keep Tier 1 items front and accessible — reduce friction to grab
Keep Tier 2 items visible but slightly off the front edge
Keep Tier 3 items behind the desk — only hand out intentionally
Note which products got the most engagement — useful for next show
Reviewed by Daniel Galpin, Co-Founder at PromoMate Australia
15+ years supplying branded merchandise for Australian businesses, events, schools, and trade teams. Focus areas: product selection, print method fit, MOQ planning, and reducing order risk. Meet the team →
🎪 Ready to sort your trade show merch?
Whether it’s your first booth or your fiftieth, we’ll help you put together a product mix that works — on budget, on time, no dramas.
👉 Get a Free Quote →
❓ Frequently Asked Questions
1. How far in advance should I order promotional products for a trade show?
For most standard items, 4–6 weeks before the show is the sweet spot. That covers production, branding, and freight without any stress. Budget items like pens and lanyards can sometimes be turned around in 7–10 business days in a pinch, but for anything mid-range or premium — or if you need custom colours — give yourself at least 4 weeks from when you place the order. The earlier the better, honestly.
2. What’s a reasonable budget for trade show merchandise?
There’s no single answer, but a common starting point is allocating $5–$10 per expected booth visitor across your full product mix. So if you expect 300 genuine conversations across the show, a $1,500–$3,000 merch budget is realistic. Scale up for major national expos or if your average deal size justifies a higher investment per lead. Don’t forget to factor in freight and any display items.
3. What are the most popular trade show giveaways in Australia right now?
Reusable drink bottles, tote bags, and branded pens consistently perform well. Coffee cups have had a big run in the last few years as Australians have become genuinely attached to their reusables. Power banks are well-received as premium items. Anything that solves a real daily problem — carrying stuff, staying hydrated, keeping your phone charged — tends to stick around.
4. Can I get different products delivered directly to the show venue?
Yes, many suppliers including us can arrange delivery to the venue or convention centre directly. You’ll need to coordinate with the venue on freight receiving — most convention centres have specific rules about when and how freight arrives, and some charge handling fees. Confirm all of this well before show week and make sure your boxes are clearly labelled with your company name, stand number, and show dates.
5. What’s the minimum order quantity for most trade show items?
It varies by product. Many pens and basic giveaways have MOQs of 100–250 units. Drink bottles and coffee cups are typically 50–100 minimum. Tote bags often start at 100–150. Premium items like power banks can sometimes be ordered in quantities as low as 25–50. If you’re running a smaller event or need lower quantities, get in touch — we can often find solutions or work across a few product lines to make it work.
6. How do I make sure my logo looks good on the products?
Supply your artwork as a vector file (AI, EPS, or SVG) where possible. This gives the cleanest result at any size, on any surface. If you only have a PNG or JPEG, make sure it’s high resolution (300dpi minimum). We’ll send you an artwork proof before production — always review this carefully and check the logo placement, colour, and size before approving. That’s your last chance to catch anything before it goes to print.
7. Should I brand everything with just my logo, or add other info?
For most items, your logo plus website URL is enough — and sometimes just the logo. Packing in too much text (phone numbers, taglines, slogans) makes items look cluttered, especially on small print areas. The goal is brand recall and easy lookup, not cramming a business card onto a pen. If the item has a larger print area — like a tote bag or notebook — a tagline can work well alongside the logo.
8. What if I need products for multiple upcoming shows?
Ordering in bulk across several shows at once almost always saves you money — both on unit cost and on repeat setup fees. If you’ve got three trade shows across the year, talk to us about ordering your full year’s requirements upfront. We can warehouse stock in some cases, and you’ll lock in better pricing. It also takes the scramble out of each individual show — your merch is already sorted.
Recommended products

- Corporate Christmas Gifts Australia: What to Order (and When) for 2026
 Clients, staff and the long thank-you list each need a different gift. Here’s what to order for Christmas 2026, and when to brief it so it arrives before the office shuts.
- You’ve Been Asked to Sort the Merch. Where Do You Start?Need to sort branded merch? Use three simple questions to choose promotional products for events, staff and clients, then send us your brief for a free proof.
- 8 Unusual Promotional Products People Actually Want to KeepExplore 8 unusual promotional products for Australian teams and clients, with practical branding advice, real product links and free visual proofs.
- How to Choose Promotional Product Colours That Suit Your BrandBold merchandise can look brilliant or completely off-brand. Here is how to choose stock colours, custom PMS products and full-colour decoration with fewer surprises.
- Budget vs Premium Promotional Products: What Actually Earns the Spend?Compare budget, mid-tier and premium promotional products using real PromoMate catalogue examples. Match the item to the audience, use, quantity, artwork and occasion.
Screen Printing vs Embroidery: Which Branding Method Is Right for Your Merch?
🖨️ Two Methods, Very Different Results — Let’s Sort It Out
G’day. If you’ve been going back and forth between screen printing and embroidery for your next merch order, you’re not alone. It’s one of the most common questions we get from marketing managers, event coordinators, and business owners who want their brand to look sharp — but don’t want to get the decision wrong and end up with 300 polos that feel off.
The honest answer is: both methods are excellent. But they suit very different jobs. Picking the wrong one for your application is where buyers come unstuck — and that usually means either overspending, or ending up with a result that doesn’t hold up the way you expected.
This guide breaks it down so you can stop second-guessing and just order the right thing.
🎨 What Is Screen Printing?
Screen printing (also called silk screening) pushes ink directly through a mesh stencil onto the surface of the garment or product. Each colour in your design gets its own screen, and the ink is pressed through layer by layer. The result is a flat, vibrant print that sits on top of the fabric.
It’s been the workhorse of the promo products industry for decades. When you’re ordering in volume and you want bold colours that don’t fade after a few washes, screen printing does the job. Think: event t-shirts, trade show giveaways, corporate uniforms for larger teams, tote bags at conferences, and school spirit gear.
Screen printing works best on smooth, flat surfaces — cotton and cotton-blend t-shirts are the sweet spot. It struggles on highly textured fabrics or curved surfaces where the ink can’t sit flat.
Screen Printing: Quick Facts
Best for: T-shirts, tote bags, flat cotton garments, high-volume runs
Colour limit: Typically 1–6 spot colours per design (each colour = a separate screen)
Setup cost: $20–$50 per colour per screen (amortised over the run)
Minimum quantities: Usually 24–50 units to make setup costs worth it
Wash durability: Excellent — 50+ washes with minimal fading if cured properly
Turnaround: 7–14 business days standard; rush available at a premium
🧵 What Is Embroidery?
Embroidery stitches your logo directly into the fabric using thread. A machine reads a digitised version of your artwork and punches it into the garment stitch by stitch. The result is a raised, textured design that looks and feels premium — the kind of logo you’d see on a well-made polo or a structured cap.
If screen printing is the loud mate at the pub, embroidery is the one in the nice polo. It’s the standard choice for corporate workwear, team uniforms, hospitality and hotel staff, sporting clubs, and anyone who wants their branded gear to feel professional rather than promotional. Browse our full embroidered polos, corporate jackets, and branded t-shirts to get a feel for what suits embroidery best.
Embroidery suits thicker, structured fabrics — polos, fleeces and pullovers, jackets, beanies, and caps. It holds up really well in the wash because the thread is woven into the fabric itself — nothing to peel, crack, or fade in the sun.
The trade-off is detail. Embroidery handles solid shapes and block lettering really well, but fine gradients, tiny text under 6mm, or highly intricate artwork can lose definition in the stitching. Your artwork will need to be digitised (converted into a stitch file), which is a one-off setup cost.
Embroidery: Quick Facts
Best for: Polos, caps, jackets, beanies, fleece, structured workwear
Colour limit: No real limit — each thread colour is just a thread change, though very high thread counts add cost
Setup cost: $50–$120 one-off digitising fee (charged once, reused forever)
Minimum quantities: Often as low as 12 units — more viable for small teams
Wash durability: Exceptional — the thread is part of the fabric and won’t fade or peel
Turnaround: 7–14 business days; digitising adds 1–2 days if artwork is new
🎯 Not sure which method suits your order?
Tell us what you’re after and we’ll point you in the right direction — no obligation, no sales pitch.
👉 Get a Free Quote →
⚖️ Screen Printing vs Embroidery: Head-to-Head
Here’s the practical side-by-side comparison most buyers actually need:
| Factor | Screen Printing | Embroidery |
|---|---|---|
| Setup Cost | $20–$50 per colour (screens) | $50–$120 one-off digitising fee |
| Cost Per Unit (50 units) | $4–$8 per print location | $6–$12 per garment |
| Cost Per Unit (200+ units) | $2–$4 per print location | $4–$8 per garment |
| Minimum Qty | 24–50 units typical | 12–24 units typical |
| Colour Range | 1–6 spot colours (per run) | Unlimited thread colours |
| Fine Detail | Excellent (halftones, gradients possible) | Limited — 6mm+ text, solid shapes |
| Wash Durability | Very good (50+ washes) | Exceptional (doesn’t fade or peel) |
| Texture / Feel | Flat, smooth print surface | Raised, tactile stitched finish |
| Perceived Value | Good for casual/event use | Higher — looks corporate and premium |
| Best Fabrics | Cotton, cotton-poly, flat surfaces | Polo, fleece, cap, jacket, beanie |
| Turnaround | 7–14 business days | 7–14 business days (+ digitising if new) |
| Large Designs | Full chest prints, oversized graphics — yes | Limited to ~30cm x 30cm max stitch area |
📦 Real-World Scenarios: Which Method Wins?
Scenario 1: You’re ordering 500 tote bags for a trade show or conference
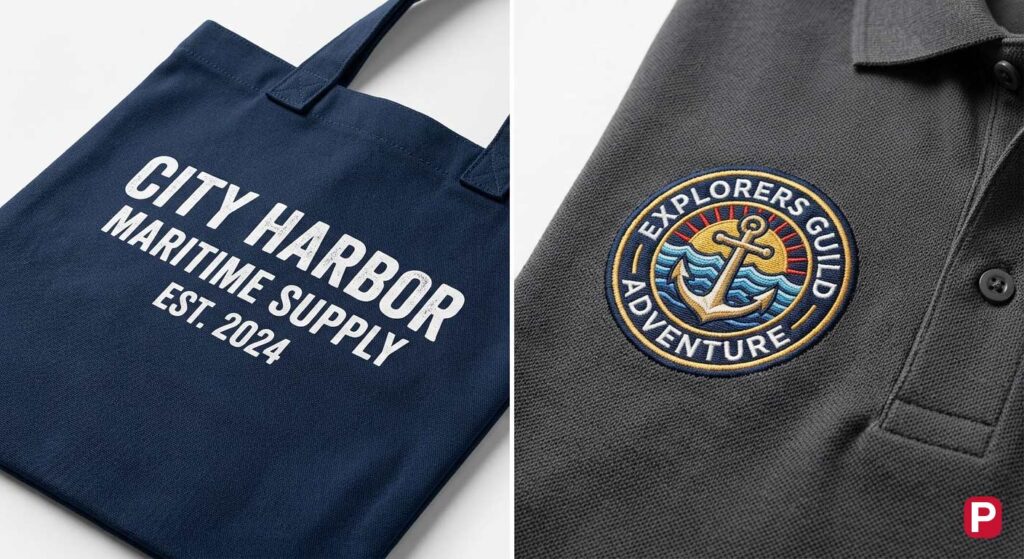
Screen printing, every time. The setup cost gets spread across 500 units, your cost per bag drops significantly, and screen printing on canvas tote bags produces a clean, vibrant result. Embroidery on a flat canvas bag looks awkward and costs more per unit without adding value.
Scenario 2: You need 50 embroidered polos for your team
Embroidery wins outright. Fifty polo shirts is a very reasonable quantity for embroidery — the one-off digitising cost is a minor add-on across the run, and the result looks genuinely professional. A screen print on a polo fabric can feel cheap by comparison, especially on textured pique fabric where the ink sits unevenly. Have a look through our corporate polo range — the pique and performance knits there are designed to take embroidery cleanly.
Scenario 3: School sports carnival, 200 cotton t-shirts, tight budget
Screen printing is the clear answer. Simple 1–2 colour design, flat cotton fabric, large quantity — screen printing is made for exactly this. Cost per shirt drops well below embroidery at volume, and bold sporting colours pop on cotton. See our cotton t-shirt range for the most popular event and team styles.
Scenario 4: A construction company ordering 30 high-vis jackets for a site crew
Embroidery. Full stop. High-vis jackets go through serious punishment — constant washing, outdoor wear, abrasion. Embroidery holds up to that in a way no print can match. Reflective and hi-vis fabrics don’t always take ink cleanly either, so embroidery is the safer bet for quality and compliance. Most of our branded jackets and outerwear is purpose-built for embroidered branding — drill cotton, ripstop, and reflective panels included.
Scenario 5: A restaurant chain ordering 150 structured caps for front-of-house staff
Embroidery on structured caps is the standard for a reason. The curved surface of a cap makes screen printing difficult and inconsistent. Embroidery sits cleanly on a cap front panel, looks polished, and survives daily wear in a kitchen or hospitality environment without any drama. Pair caps with embroidered aprons and staff polos for a fully on-brand front-of-house look.
🔧 Other Branding Methods Worth Knowing
Screen printing and embroidery cover most jobs, but they’re not the only game in town. A few other methods worth knowing about:
Pad Printing — The go-to for hard products like pens, USB drives, keyrings, and stress balls. It uses a silicone pad to transfer ink onto irregular curved surfaces where screen printing can’t reach. Cost-effective at volume, typically 1–4 colours.
Laser Engraving — Burns your logo permanently into the surface of metal, wood, leather, or glass products. Think metal water bottles, timber USB drives, and leather journals. You get a clean, permanent mark with no ink involved. No colour options, but it won’t wear off either. Looks sharp on gift-style drinkware and corporate gift products.
DTF (Direct to Film) / Heat Transfer — A newer method that prints your design onto a special film, then heat-presses it onto the garment. It handles full-colour, photographic designs without the screen setup costs of screen printing. Great for short runs (under 24 pieces), highly detailed artwork, or garments that don’t suit screen printing. The finish is slightly different to screen printing — a bit more plasticky to touch — but it’s come a long way in recent years.
Dye Sublimation — Infuses the dye directly into polyester fibres, producing full-colour, edge-to-edge prints with no hand feel at all. It’s ideal for sportswear, performance teamwear, sublimated polo shirts, and any product where you need an all-over photographic print. The catch: it only works on white or very light polyester. Cotton won’t take it. See more about all available methods on our Printing Processes page.
🚫 Common Mistakes Buyers Make When Choosing a Branding Method
Choosing screen printing because it sounds cheaper — without checking setup costs. Screen printing has per-colour setup costs. A 4-colour logo on a 24-unit run can cost more per garment than embroidery once you factor in screen charges. Always ask for a full quote including setup before assuming one method is cheaper.
Trying to embroider a logo with tiny text or fine gradients. If your logo has detail that looks great on a business card, it won’t necessarily translate to embroidery. Thread can’t replicate halftones or text under about 6mm high. Your supplier should flag this — but a good rule of thumb is to simplify your logo artwork before embroidering. Check our Artwork Requirements page if you’re unsure what format to supply.
Ordering the wrong garment fabric for the chosen method. Screen printing on a textured fleece or embroidered pique polo with a large print area are both recipes for disappointing results. Match your method to your fabric — your supplier should be steering you right on this from the start.
Waiting too long to order. “Standard” lead times of 7–14 business days assume your artwork is ready to go and approved quickly. Factor in digitising time for embroidery, back-and-forth on artwork approvals, and freight. If your event is in three weeks, contact your supplier now — not next week.
Assuming more colours always looks better. A clean 1–2 colour screen print often looks sharper and more professional than a 6-colour design that’s been crammed onto a shirt. Strong, simple branding almost always outperforms complex artwork on apparel. Less is usually more.
🧢 Need a second opinion on your artwork or method choice?
Send us your logo and tell us what you’re printing on — we’ll let you know what’ll work and what won’t before you commit to anything.
👉 Request a Free Quote →
Reviewed by Daniel Galpin, Co-Founder at PromoMate Australia
15+ years supplying branded merchandise for Australian businesses, events, schools, and trade teams. Focus areas: product selection, print method fit, MOQ planning, and reducing order risk. Meet the team →
❓ Frequently Asked Questions
1. Is embroidery always more expensive than screen printing?
Not necessarily — it depends on quantity and design complexity. For small runs (under 50 units), embroidery can actually be cheaper because screen printing setup costs hit harder at low quantities. At 200+ units, screen printing typically wins on per-unit cost. For accurate comparisons, always get a quote for both methods side by side.
2. Can I embroider a full-colour logo with gradients?
Not directly. Embroidery works in solid thread colours — it can’t replicate gradients or photographic detail the way screen printing or DTF can. A skilled digitiser can approximate gradients using techniques like blending stitches, but it won’t be a pixel-perfect match. If your logo has complex colour work, screen printing or DTF will serve you better.
3. How long does embroidery last compared to screen printing?
Embroidery lasts longer, full stop. The thread is part of the fabric — it can’t peel, crack, or fade the way ink can. A well-executed screen print on quality cotton will still look good after 50+ washes, but embroidery on a polo or jacket will typically outlast the garment itself. For daily-wear workwear, embroidery wins on durability every time.
4. What’s the minimum order quantity for screen printing?
Most Australian suppliers require a minimum of 24–50 units for screen printing to be cost-effective. Below that, the per-colour screen setup fees make the per-unit cost very high. For small runs under 24 units, DTF or heat transfer is usually the better option — lower setup costs and no minimum quantity restrictions.
5. Can screen printing be done on caps or beanies?
Caps are not ideal for screen printing due to the curved surface — embroidery is the standard for structured caps. Beanies can take either method, but embroidery tends to hold its shape better on the stretchy knit fabric. Flat-knit beanies with a clean fabric face can be screen printed with care, but check with your supplier first.
6. Do I need to pay the digitising fee every time I reorder?
No — digitising is a one-off cost. Once your logo has been digitised into a stitch file, that file is stored and used for every subsequent embroidery order. You only pay the digitising fee once. Keep this in mind when you’re comparing first-order costs to reorder costs — embroidery gets cheaper relative to the first order on every reorder you place.
7. Which method is better for dark-coloured garments?
Both methods work well on dark fabrics, but in different ways. Screen printing on dark garments usually requires an underbase layer of white ink to make colours pop — this adds cost and slightly increases the thickness of the print. Embroidery doesn’t have this issue at all since thread colour shows regardless of the garment colour. For dark polos or jackets, embroidery is often the cleaner choice.
8. How should I supply my artwork for embroidery vs screen printing?
For both methods, a vector file (.ai, .eps, or .svg) or a high-resolution PNG (300dpi+) is the starting point. For embroidery, your artwork gets converted into a digitised stitch file — your supplier handles this, but simple, clean artwork makes for better embroidery results. For screen printing, Pantone colour codes help ensure accurate colour matching. Check our full Artwork Requirements guide for everything you need to know before submitting.
📋 What to Send Your Supplier (5-Minute Checklist)
After 15+ years of quoting jobs, the orders that go smoothest are the ones where the buyer briefs us properly up front. Half the back-and-forth on a typical job is because something basic was missing in the first email. If you can answer these six questions before you reach out, you’ll get a sharper quote, faster turnaround, and far fewer surprises.
Quantity — exact, not “around 100”. Per-unit pricing changes at every quantity bracket.
Garment type and fabric — polo, t-shirt, hoodie, cap. If you’ve spotted a specific product, send the link.
Print method preference (or “open to suggestions”) — being open often saves you money.
Number of print locations — front only, front + back, sleeve, etc. Each location is a separate cost.
Logo file — vector if you have it. If not, send what you’ve got and we’ll let you know.
Deadline — the date you need the goods in hand, not the dispatch date. Build in a buffer.
A clean brief like that gets a turnaround quote in hours, not days. A vague enquiry triggers a chain of clarifying emails — and your event keeps creeping closer.
💡 Three Things Most Buyers Don’t Realise
1. You can mix methods on the same order. Plenty of jobs use embroidered polos for the management team and screen-printed t-shirts for the broader staff or event giveaway. Same artwork, same brand consistency, very different per-unit cost. Worth asking about if your order has multiple use cases.
2. Embroidery thread colours can be matched to your Pantone — but not always exactly. Thread comes in a finite range (usually Madeira or Isacord charts). A good supplier will match the closest shade and send you a thread sample for approval before stitching the run. If brand colour exactness is critical, ask for the thread match upfront.
3. Print position matters more than print method. A logo placed too low on a polo, or too far to the side on a cap, can ruin an otherwise great job. Always ask for a digital mockup showing exact placement and dimensions before approving production. Reputable suppliers will provide this as standard — if they don’t, push for it.
Still not sure which way to go? No dramas — just send us a message with your order details and we’ll give you a straight answer. We’re not going to push you toward the more expensive option; we’ll tell you what actually makes sense for what you’re trying to do.
📩 Email us at [email protected] — or hit the button below and we’ll get back to you within one business day.